BlizzCon 2014!

Of course we’re attending BlizzCon this year, and if you haven’t seen or you don’t follow our Facebook page, we’re working on these two costumes for day one:

maxresdefault queen_by_mr__jack-d1xkhuv

Urzael from Diablo III, and Zagara (based off of a few different images, since there are several of her) from Starcraft II and Heroes of the Storm!


We’ve both been incredibly busy getting these together for the convention- we’re in the double digits with the countdown, now! Here’s some progress for Urzael!

2014-07-08 19.57.29

Mario first carved the rib structure for the cannon out of pink foam, then got it perfect and smooth and cast it in a quick matrix mold.

2014-07-25 20.31.25

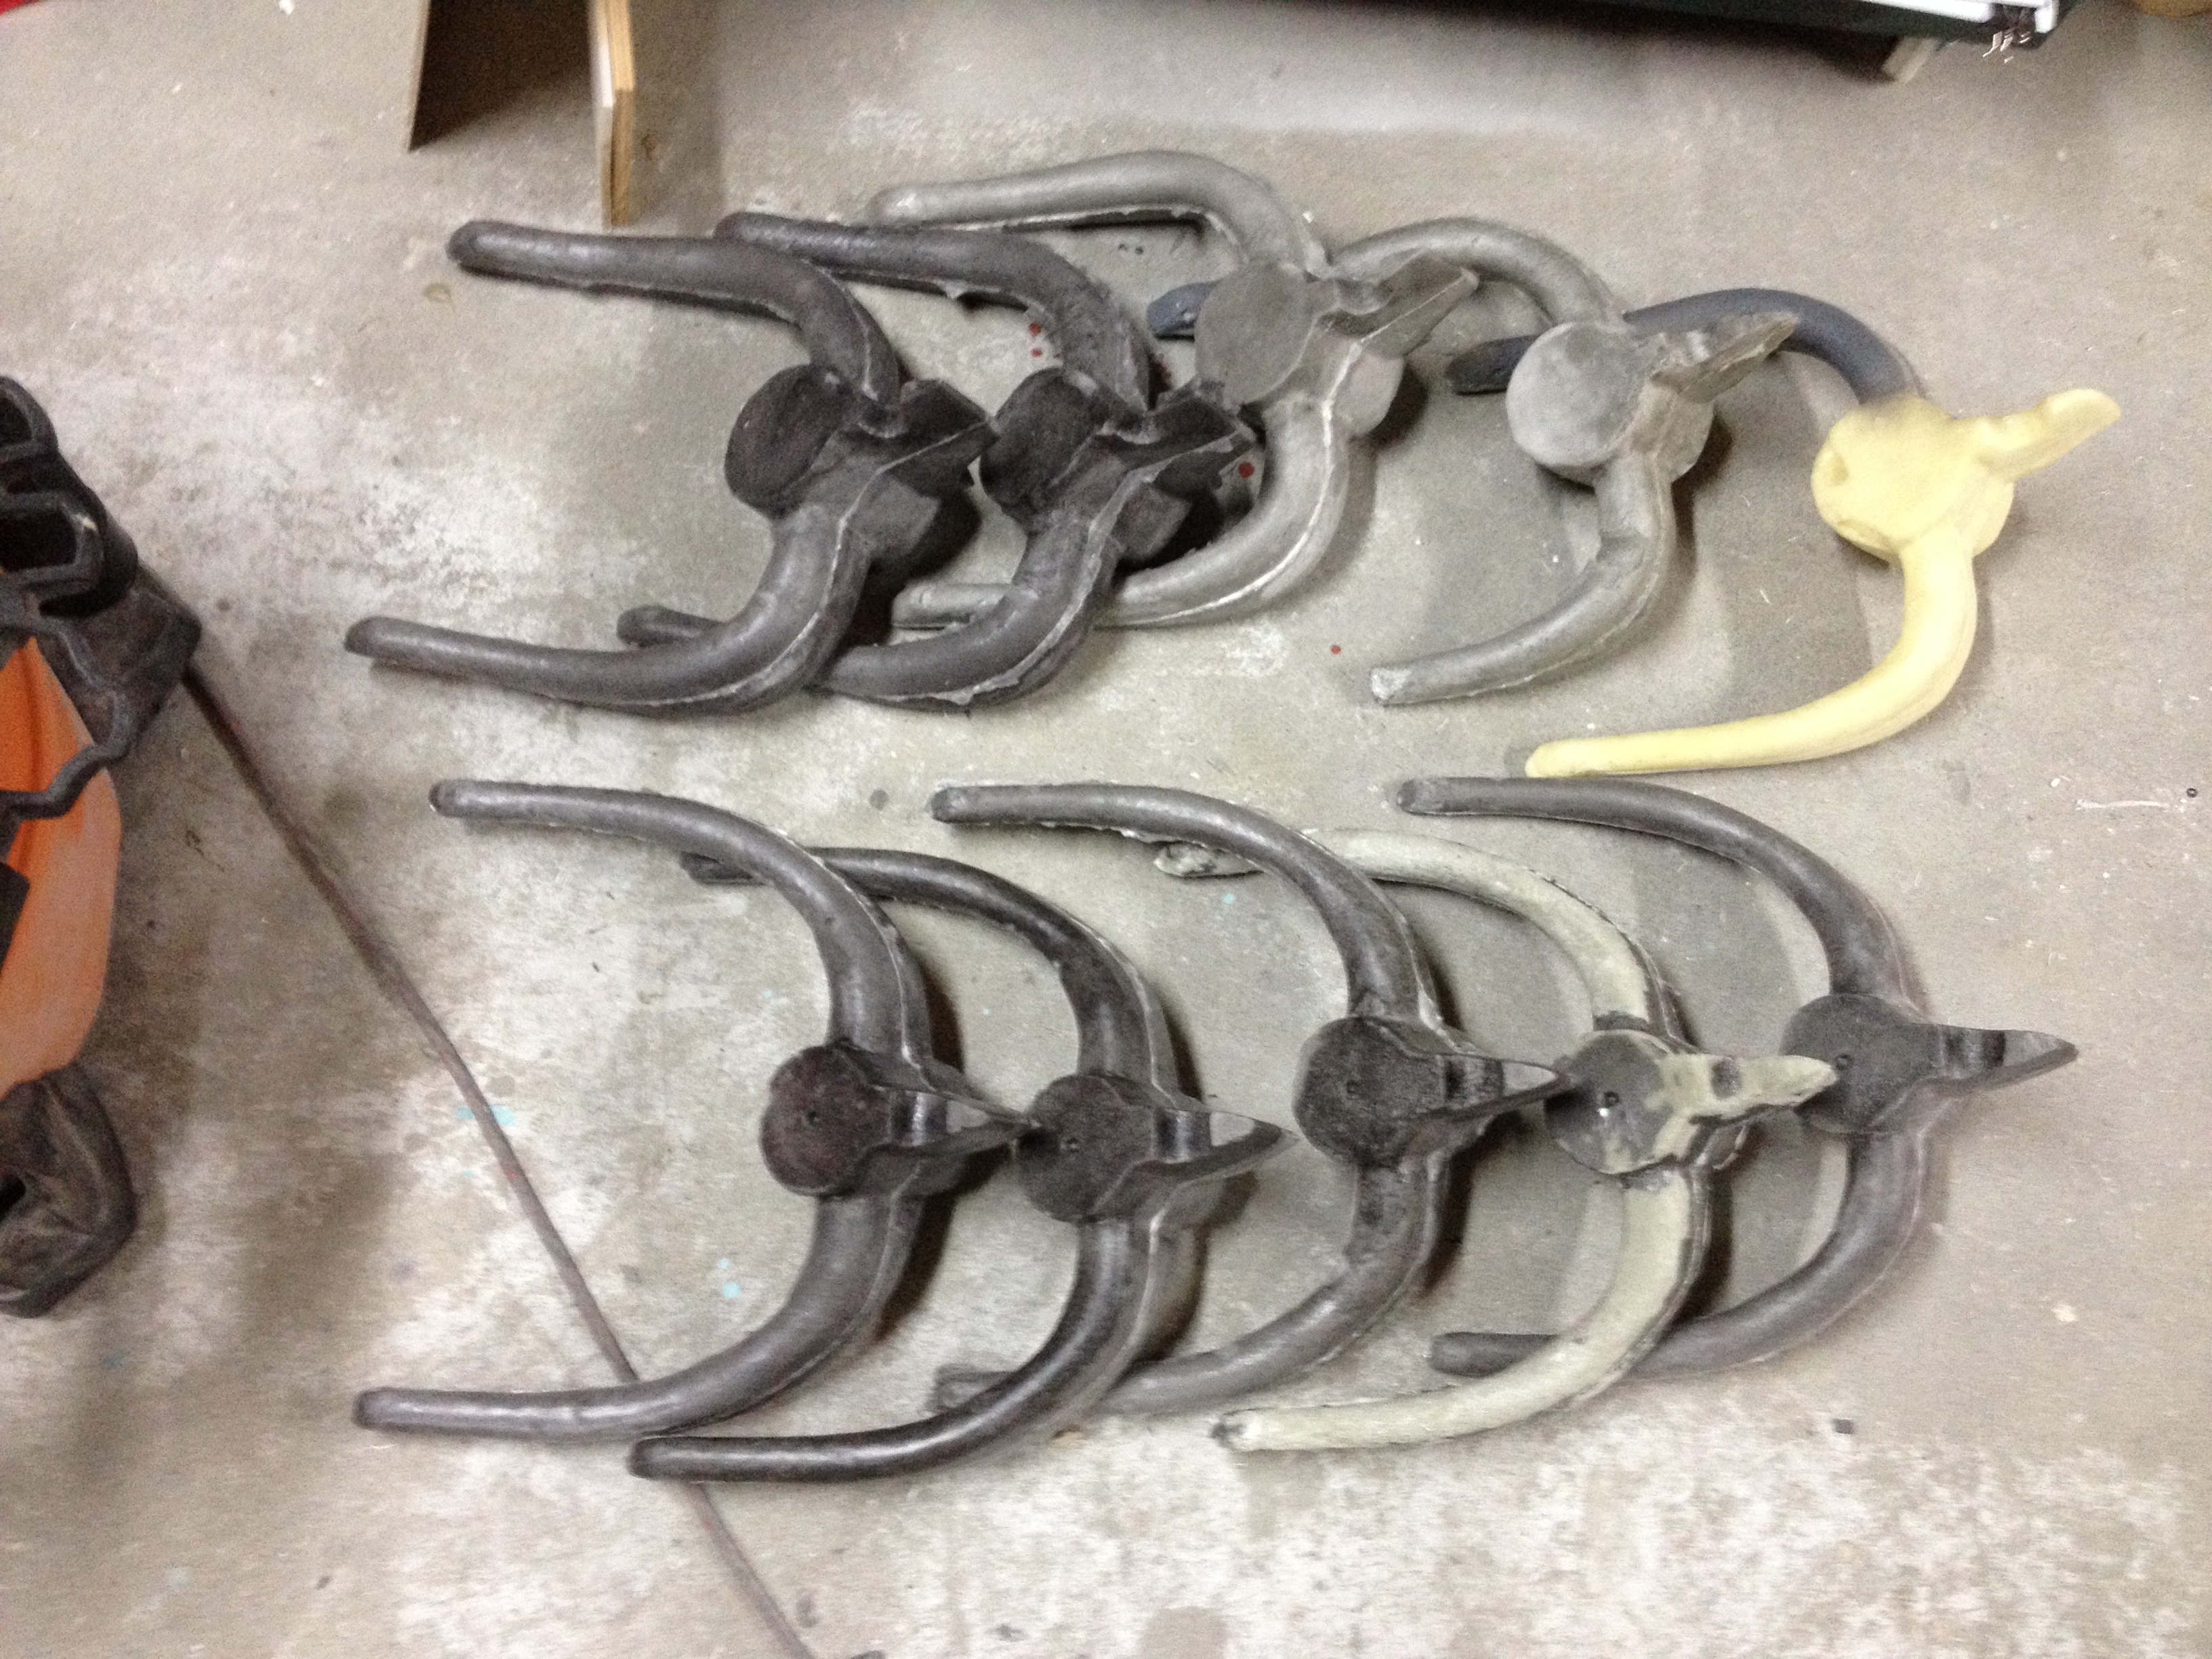
As you can see, the first few (on the right) don’t look quite perfect, but once he switched to the drill squirrel mixer, every batch came out exactly as it should. He used a two part rigid, self skinning polyurethane foam that he tinted black to help him with his painting later.

IMG_8050

This is how the ribs will look on the cannon!

IMG_8049

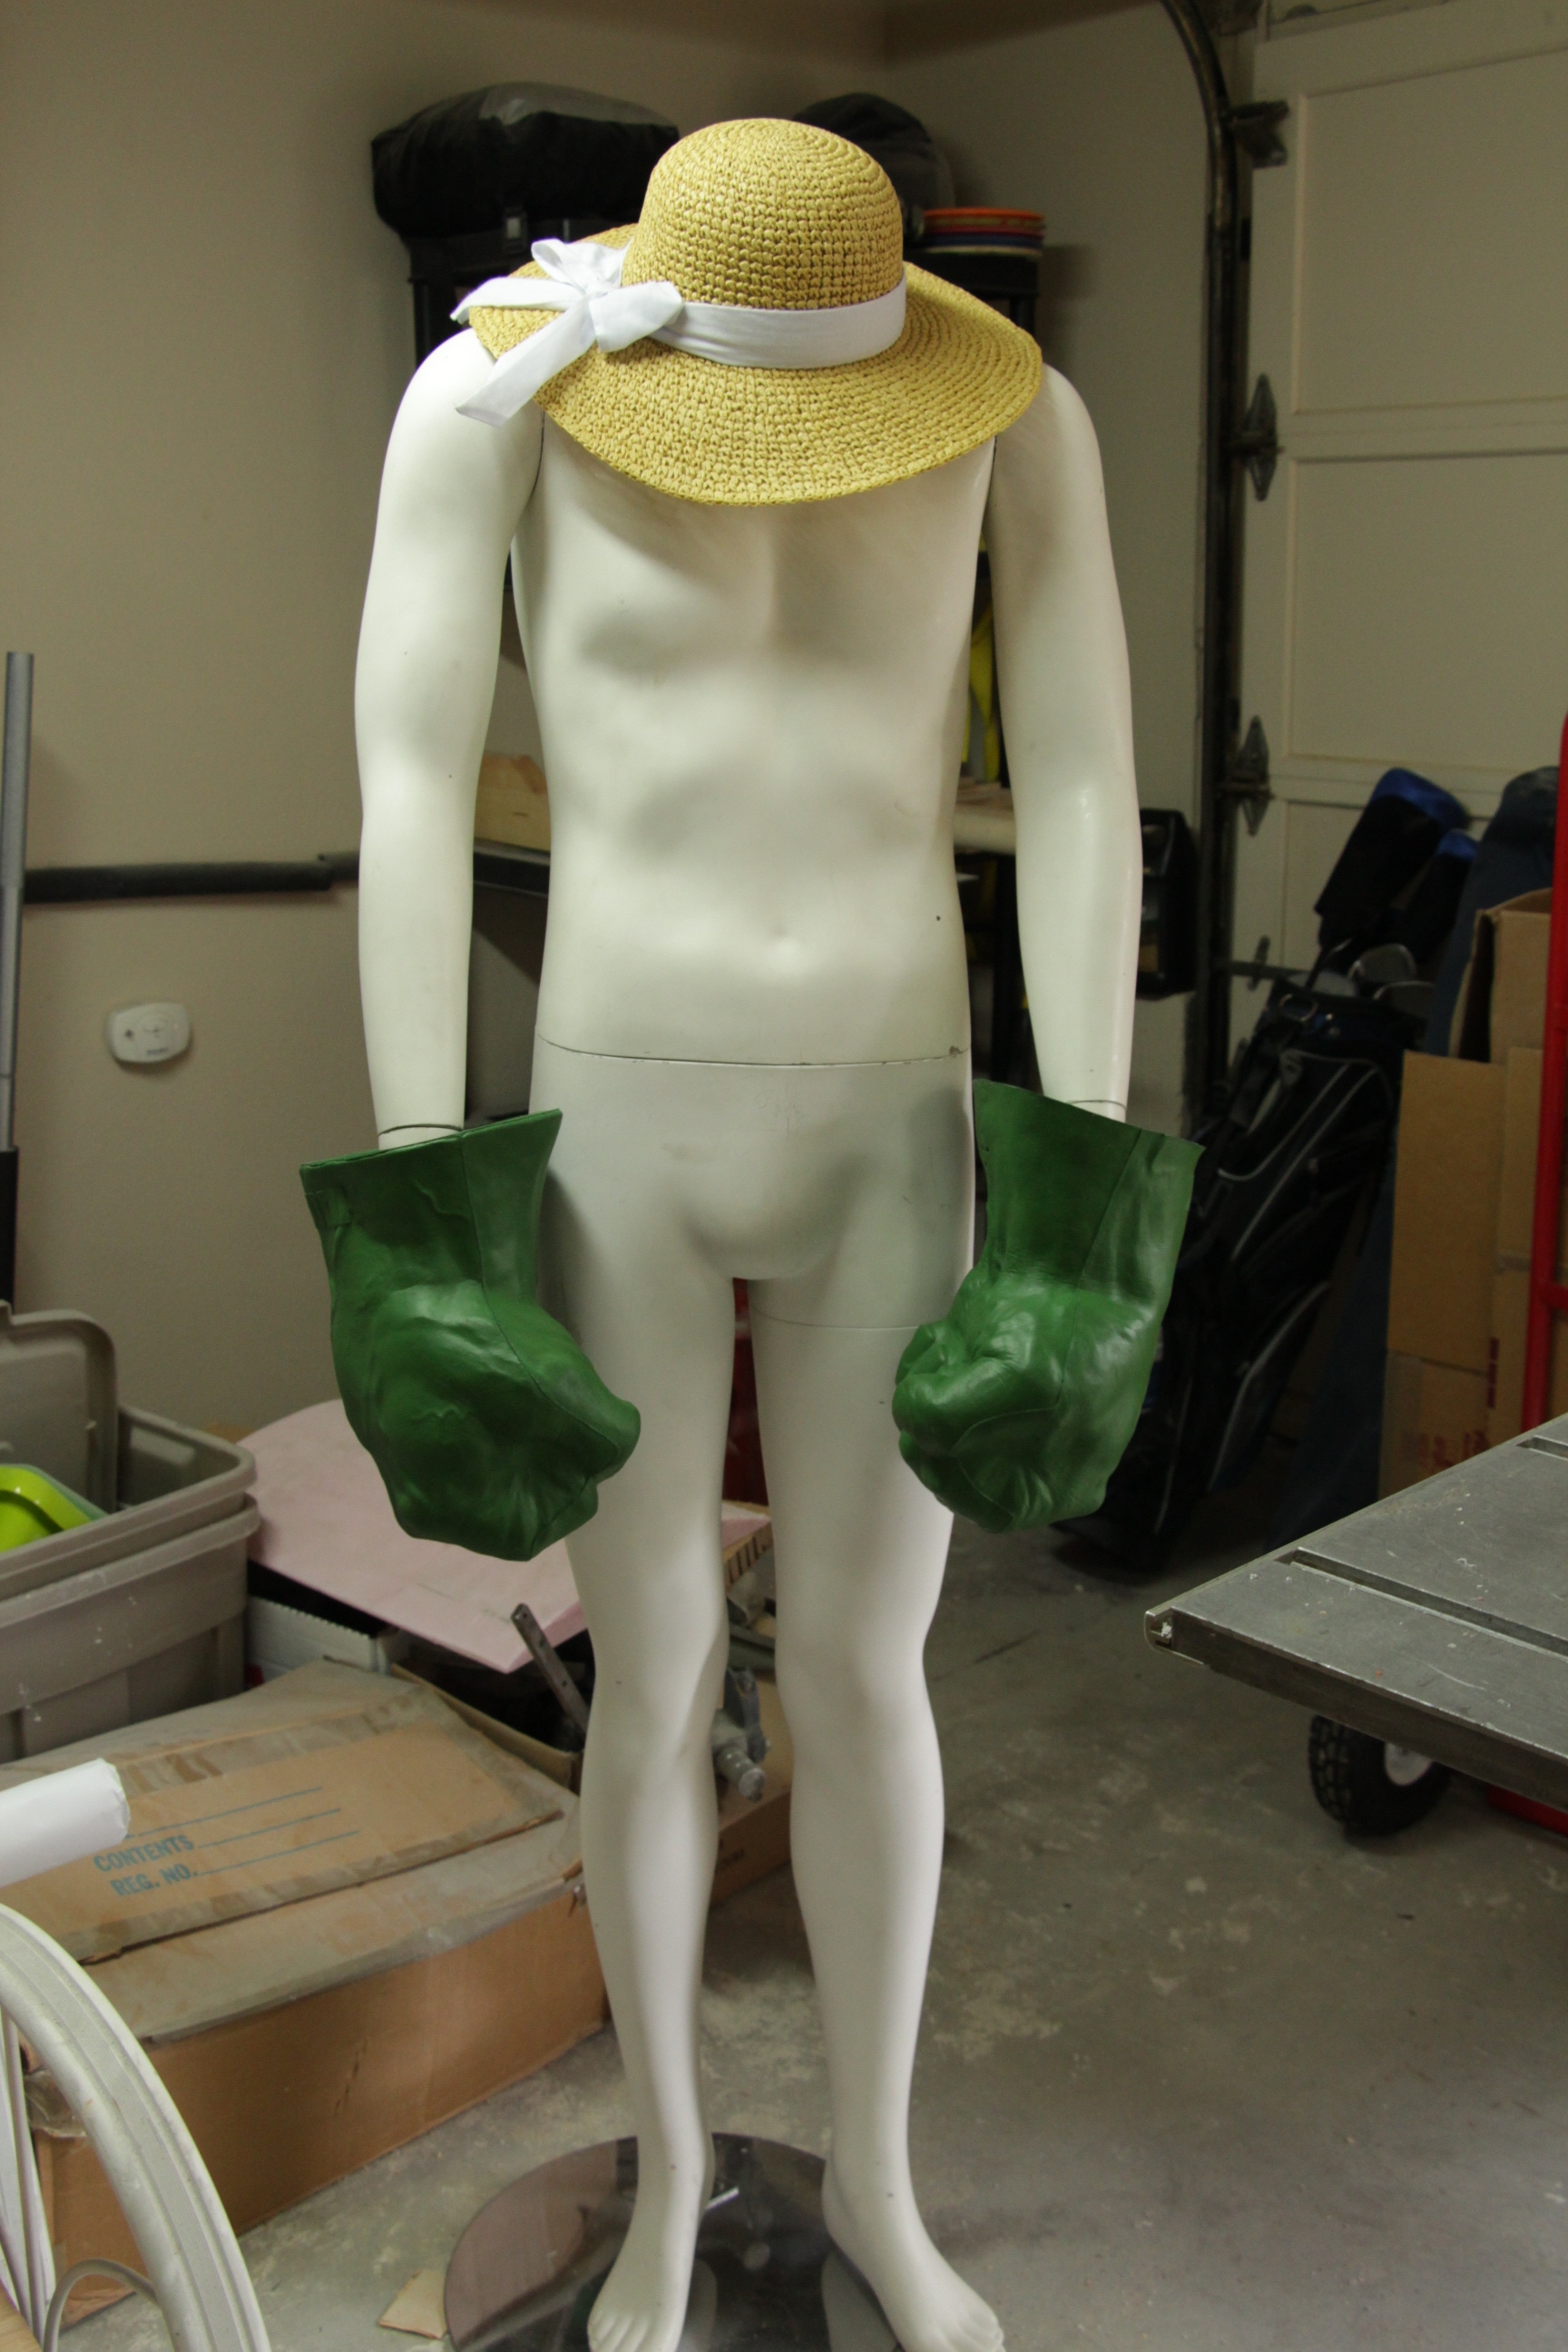
We also got a male mannequin to sculpt on, since it’s very close to Mario’s size, and we’ll be molding and casting the chest and upper arms for Urzael, since it’s impossible to 1. be as muscular as he is and 2. have orange glowing from under your skin! The Hulk hands will potentially be used for the costume, as well!


On day two, I’m going to wear my Lovely Purple Dress from my first year at BlizzCon, 2009, and Mario is still working on his second costume!

5328_260566795523_630800523_8503865_7554764_n

Here’s one of the few photos I have of it- at least I know a good quality wig now!

Oh, and this costume is a great example of finding the right undergarments. I was fully covered under this dress, but it was hidden in a way that it didn’t take away from the costume!

Also, Mario did a Prop: Live with Bill of Punished Props, so if you didn’t get a chance to watch it, you can watch it here!


We’re going to try and update more often with tutorials when we have them, so keep an eye out!


Starcraft Medic Shield Commision

Back in the start of 2011 a friend asked up to help her out with a fan art inspired Terran medic.

I took on the project even though we were knee deep in the Kerrigan build at the time. I have love of prop weapons and accessories making it very hard to turn down the opportunity to make a something as cool as a 4foot shield!! Continue reading

Queen of Blades Tutorial Step Four: Sculpting your prosthetics.

We used two different clays for our sculptures, Laguna WED clay (we went through maybe 150 lbs using it to sculpt the body suit, and using it for all the clay walls) and also Chavant Le Beau Touche (for the gloves, feet, cowl and dreads).

Let me just say, I despise sculpting. I was always so stressed to put in every little detail that was in the statue, but I knew it wasn’t possible with the time we had and the skill I had, and it made me so critical. I just didn’t enjoy sculpting at all.

Things that are important to have for sculpting for prosthetics: Continue reading

Queen of Blades update: September 27

Well… I really hope that this is my last update, and that next week I can happily report that this costume is finished. We’re pushing to get it done by Sunday, but I guess we’ll see.

This week, we have to: finish painting the body suit, paint the gloves, shoes, cast the dreads, cast another cowl (we had issues), paint the cowl, make the spikes for the cowl, make the dread holder for the cowl, paint the dreads, attach the dreads, finish putting modelling paste on the wings, sand the wings, paint the wings, and done.

This last week, we painted a lot of the body suit, finished the basic wing structure, covered it, carved the wings, and halfway covered it in modelling paste. We also sculpted the heels, practiced gluing the cowl on, and tried to mold some dreads- but it was too cold outside, and they didn’t want to rise properly. We also practiced painting the feet, with a spare foot cast we had.

That’s it for this week! We’ll see if next week I announce that it’s finished!

Queen of Blades Update: August 23

This has been a busy week for us. We never get as much done as I want to in a week, but something always happens to take up our time (Mario had duty, so he had to work on a Saturday), and I also tend to give us way too many things to get done in a week… but we’re still right on schedule.

The oven is finished, dimensions are 5 foot wide by 4 foot tall and 4 foot deep. That’s exactly enough to fit the body suit in there.

We also cleaned out the body molds (finally…) and dried them really well. I still need to get a tiny bit of clay out of one of the glove molds, but that shouldn’t take long at all.

Here’s the body core that will go inside the body molds… not exactly my size, it’s a bit larger, but we’ll be seaming and cutting down the body suit once we get it baked, and it will fit me perfectly.

We molded the hands for the gloves, we needed to do this because if we used the stone molds as they are, the gloves would have ripped from us trying to get them off of them, and the fingers would have broken off. We’re recasting in resin and will be making the thumb and last two fingers detachable to keep from ruining the gloves.

Please excuse the messy table, Mario was still working on painting a commission when I took this picture. The dreads are all sculpted, we have not had time to mold them yet, but I hope to soon.

Speaking of dreads, this is what the dreads will be attached to. This is a cowl that will be glued onto my face, and will support the weight of the dreads. I’m pretty proud of those ears; they were giving me issues before but I conquered them :)

We also got a ton of stuff in for baking the foam latex, but haven’t taken a picture of it all yet, so you guys can see it next week.

The plan for this next week is to start baking some molds! We’re drying them out right now in the oven, and Thursday or Friday we will be practicing with foam latex, to get the feel of it, then Saturday we’re having a bunch of people over to help us mold the big one- the body suit! I’m so excited to finally be able to put it on!

Queen of Blades update: July 12


This weekend, Mario and I attached some steel rods for support so the fiberglass mold won’t warp (we’re likely adding on more later on) and unmolded Kerrigan. We started by first drilling holes around the mold for bolts to go in to, then inserted the bolts and secured them with wing nuts. Then Mario used a vibratory saw to clean up the edges so the edge of the mold would be cleaner, and finally we found a seam and started to gently pry open the mold by inserting a screwdriver, and then inserting popsicle sticks all the way around.

She was fiberglassed on to the board so we had to cut her off. The mold wasn’t damaged at all from this.

More on how we fully got the mold apart later, but here are some more pictures!

I was going to do a weekly Kerrigan update, but then I realized that we’re so busy, some weeks go by that we only get a tiny bit of progress done, barely anything that’s worth mentioning on the blog, so I’ll update whenever I have more than one thing to show you guys.
Happy crafting!