
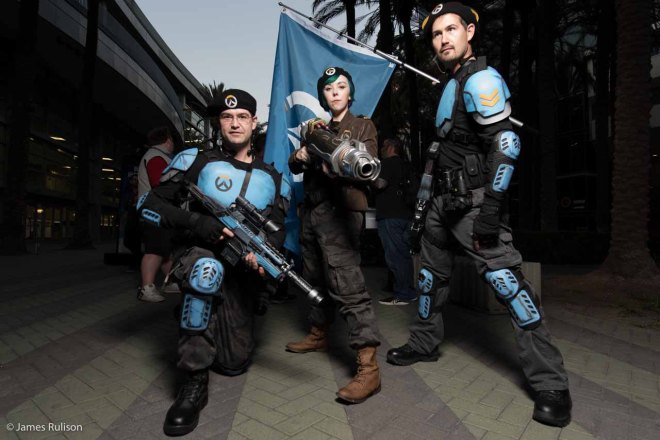
Last year at BlizzCon 2015, Mario, Dino, and I wore our wildly popular Overwatch Soldier costumes. Originally, I was supposed to wear Pharah to BlizzCon but due to tight scheduling, we decided to put her off until 2016 so we can do her the justice (ha, get it?) that she deserves.

Photo by Winged Mammal, edited by Alice Roy
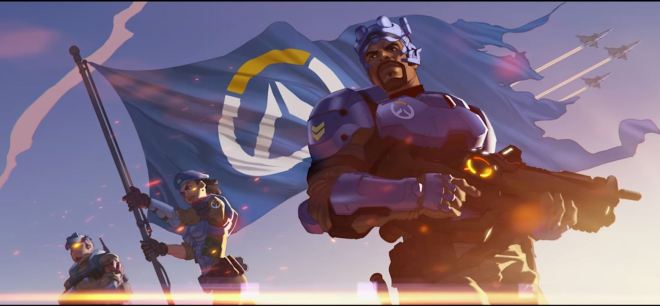
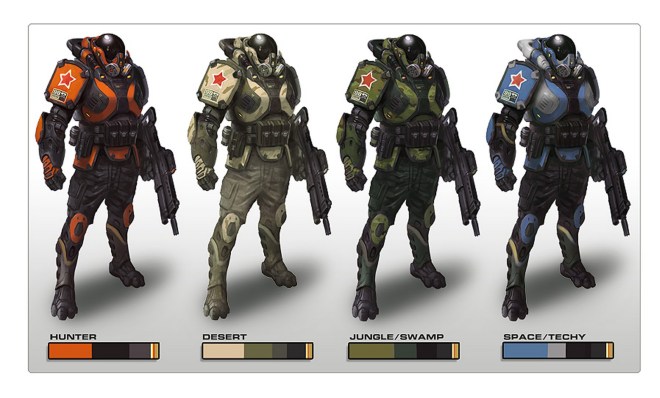
Mario and his brother Dino had already decided to make Overwatch Soldier costumes, inspired by the guys that we see in the background of some of the Overwatch art, like this one:
We made the decision to wait to finish Pharah the day before we were going to leave for BlizzCon, and though I was devastated, I quickly decided to make a quick version of the soldier costume for myself. I’ll cover how we put my costume together at the end of the post, and it’s a much easier (though not necessarily cheaper, depending on your materials) way to make the costume.
The beauty of the Overwatch Soldier costume is, no two costumes need to be the same! You can take your own spin on it: maybe you specialize in explosives, or you’re a sniper, or you fight with knives instead. You decide what type of soldier you want to be, and put it all together! As you can see in the art above, no two soldiers look alike as far as their uniforms go.
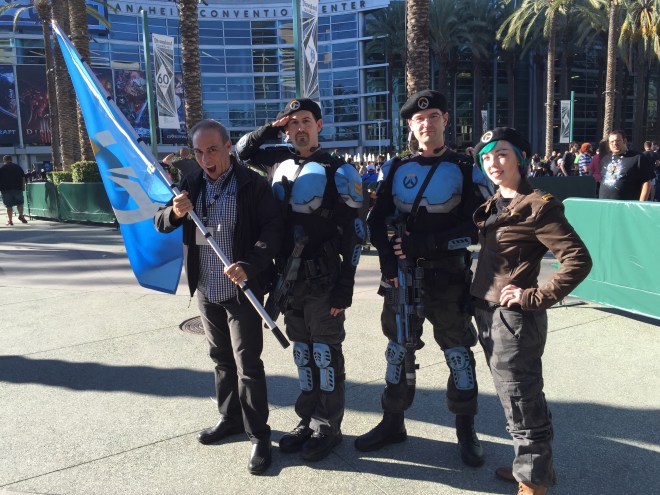
There are a few things that we decided the soldiers needed to have: a huge flag, the same blue color throughout the costumes, insignia and rank marks on the armor, and of course, berets.
The berets were easy, we just had a friend embroider the logo onto some black berets.

Photo by Blizzard
The cloth parts are easy: black long sleeved shirts for the undershirt, fingerless gloves for the hands, and camouflage cargo pants (the latter was surprisingly difficult to find in a lady size, so we went with men’s pants. Pants are pants).
The boys wore black boots, I wore brown ones. You can either blouse your pants (see the bottom of Mario and my pants, just above the shoe?) or not (Dino’s pants) to make them more or less militaristic. They also both had motorcycle headsets around their necks!
Now, before we even get started on the armor, we strongly suggest that if you don’t have any experience working with foam, you check out these ebooks:

Foamsmith: How to Create Foam Armor Costumes

Okay, now that that’s out of the way, on to the actual armor! Unfortunately no photos were taken while the armor was being made, but Dino was nice enough to put together a quick shoulder pad to show a bit of the process.
Now, the only armor made for the costumes were the shoulderpads, breastplate, and back plate. That’s it! The shoulder and knee pads were painted and weathered, and the guns are painted nerf guns (this one, to be exact) that are modified with different parts. There are a bunch of tutorials on how to modify/paint a nerf gun floating around the internet, so go explore!

This is the pattern we used for the shoulderpads. You can download it at this link and just print out at size, or size it out to fit your shoulders!

Trace the patterns onto your foam- we recommend the foam mats you can find at Harbor Freight or Costco for this armor, since it’s easy to get and easy to work with!


Using a utility knife that you keep sharp, carefully cut out the foam pattern pieces.
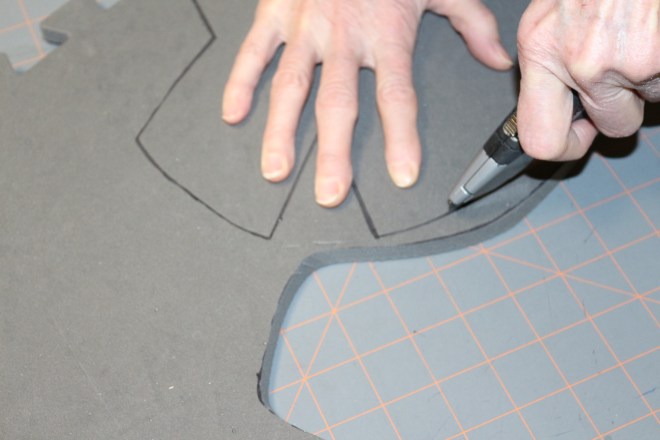


You can carefully use a dremel to clean up edges and to make bevels and designs in the foam. Make sure to wear a mask, as the foam dust doesn’t belong in your lungs!


Using the dotted lines as a guide on the template, mark where the pieces are going to overlap.


To add straps, mark where the straps will be attached (they need to go at least 2 or 3 inches into the piece to have a firm hold) and score a criss-cross pattern into the foam so that the hot glue has more to adhere to. Heating the cut marks with a heat gun will make them open up! (This is also a way to put designs into your armor).


Then glue your straps on! Make sure to be careful with the heat of the hot glue gun, I’ve been burned more than once with getting too hasty with it.

This is the backside of the shoulder pad (this is actually upside down, sorry). The loop there at the bottom actually goes around the armor that’s over the shoulder, and the loop of elastic at the top goes around the bicep.


And here are the attachment points for the back plate and breastplate!
The beauty, as I’ve mentioned, of these costumes is that as long as they are cohesive (read: military in style) you can really do whatever you’d like.

Now, the blue color for the armor was bought at Michaels but can likely also be found at Joann Fabric and Crafts, and is the Design Master brand Larkspur Blue. That was the base color, pieces were shadowed and weathered, as well as marked up with a mix of blacks, grays, and whites. Rose (my lovely mother in law) says that a spot or mark of yellow or red makes a piece look like it’s been hit or rubbed up against something- which is useful when you want it to look battle worn!
If you want to go for a more cloth-only look, that works too! My jacket was just one that I found at Kohl’s, so find a jacket that you feel fits the bill and would be able to either have the emblems painted on, or sewn on with embroidery. I suggest painting since it’s much easier and faster!

For the stencils, we used a sticky-backed adhesive stencil paper similar to this one, and after enlarging the Overwatch symbol to the desired size, we traced onto the stencil paper and then cut out the design with an x-acto knife. Make sure you either use fabric paint, or mix in a paint additive that makes acrylic paint more flexible, so your design stays on without flaking off!
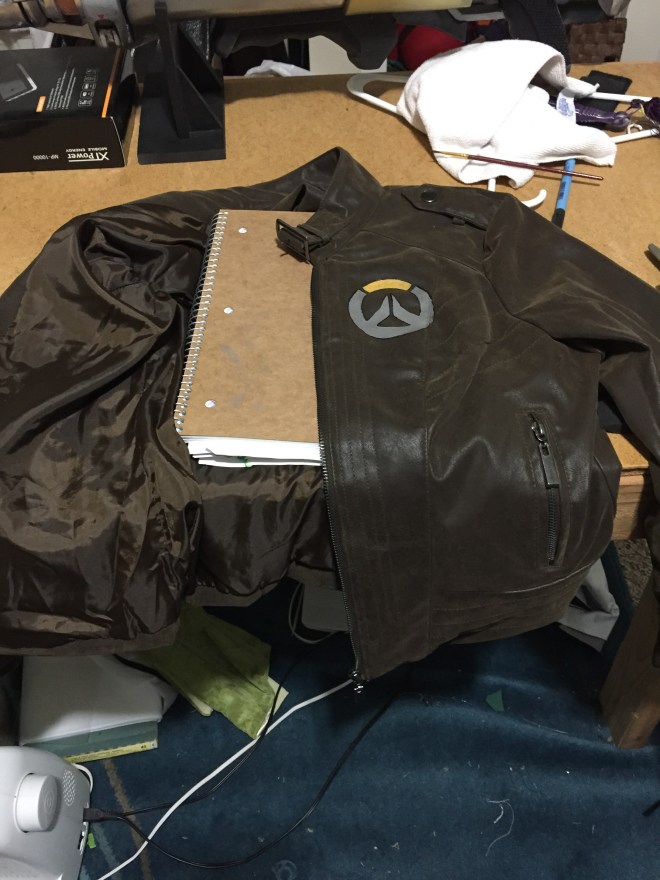
You’ll also want to make sure to paint the design on while the jacket is laying down, and with something hard and flat underneath it to avoid any creases in the design. (Please excuse the messy work room. This was the day before we left for BlizzCon, after all!) We decided to go with the emblem on the chest and on the back, but if your jacket has room for it, you could also paint it on the shoulder (or paint your desired rank on the shoulder!).
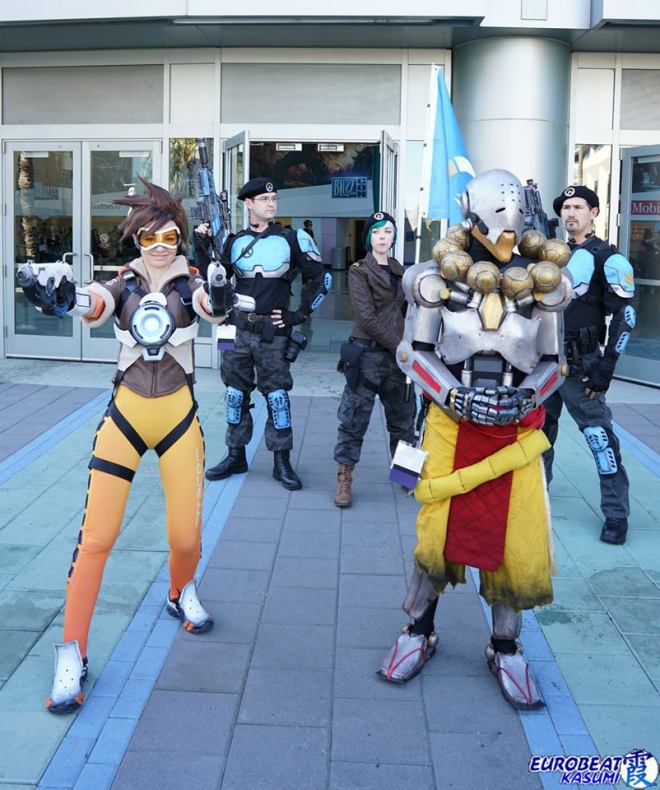
Random side note, did we ever mention that we got to meet Darin De Paul, the voice of Reinhardt? We were eating lunch when he came up to us and asked for our photo! It was probably the best part of the entire weekend.
Back to the costume. That photo above also serves another purpose: you can see the full body costume for all of us. For your pants, you can either go camo or khaki or anything that really reads military. Slap a patch on a black beret, throw on a black undershirt, find some military looking boots, and you’re ready for action!
We think it’d be a lot of fun for other people to dress up as Overwatch Soldiers, especially if a large group does it just to find heroes to stand behind in photos! It really was a lot of fun, and since we won’t be soldiers this year (maybe day two), maybe we’ll meet some of you as soldiers instead!
Before I sign off, I want to leave you with some inspiration photos that Mario saved last year for the solider costumes:


I have even put together a list of things on Amazon (we don’t have any affiliation with them, it’s just where we almost always shop, haha) to make things easier if you want to shop online: just click here!
As usual, feel free to comment or contact us with any questions!
