Horns are a pain in the butt. You have only a few good options when you need them for your cosplay. You can buy real horns…. but that’s pricey, or you can make your own but that can be messy….. or is it!!
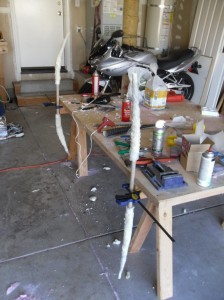
Quick background on this project. I needed a set of 4 horns for a shield. These needed to be over 12 inches long and pretty thin. I got lucky on this and had a form I could use, but these could easily be done free hand as well.
Materials: Expanding foam and wire mesh, that is all you will need.
Total cost $9.00 on the mesh (enough for 2 big horns)
$4.99 on the foam (still haven’t used it all up)
________________________________________
Cost per horn…. about $4.00 dollars for me. Price will vary a bit but this is much much cheeper then other methods and the end product is strong and able to take some abuse.
How to do it:
Start with a general idea of how you want this horn to look
Is it wide at the bottom?
Long and Narrow?
Short and thin?
I used a form from another horn I had
 I split the mesh in half lengthwise and used it to wrap the horn.
 Once its wrapped and you’re happy with the over all look, I recommend a few dobs of hotglue to help it hold its shape. The mesh is very bendable but it will always have a bit of spring to it.
 Horn copy is almost done,
You should be asking your self “Where is the spray foam” or at least wondering why you purchased it at this point. This wire form is a great way get the look of a horn but is not very tough. I have seen many tutorials out there where people start to cover the horn at this point with paper mache or even fiberglass.
 Time to fill the form with the spray foam, I left the end open so I could get the nozzle of the spray foam down in to it to help fill the horn. There are also a few small holes cut in the mesh just to make sure I can get the whole thing filled.
I have also mounted them on a wooden dowel because that’s how my costume needs them :)
I failed to take any good pictures of the process of filling them with foam, but its not really something you should need help with. Put the can together, stick the straw in to the horn, and fill full of foam. If some squirts out of the mesh that’s fine. You can wipe it off once you’re done filling it full.
 Here are all 4 of the horns I did drying. The foam will take 8 hours to cure to full strength and will expand through the mesh and look a bit like an alien egg…. or something..
 Next day and the foam is dry. Using a sharp knife, cut away the extra foam and don’t worry about being very gentle, the mesh will keep you from cutting too deep and ruining your hard work.
Total weight of the 4 horns and dowel is under 2 pounds.
Prep your horn with a good sanding of 80-120 grit sand paper and finish with your method of choosing. Paper mache will work very well to help keep it light.
Hope this helps and best of luck with all your cosplay work!


 Both our Kalecgos and Tyri costumes are about 90% done, male and female witchdoctors at about 85%.
 I decided not to make the pigtails so much longer than the hair itself, I may cut the back of the wig so that it’s a little shorter than the pigtails but over all I’m pretty happy with the length I’ve got.

 Mario and I had a great day at SacAnime! We drove 2 hours to get there, and ended up stopping a few places on the way (since we found out it didn’t open until 1pm on Friday) then arrived right as they opened. There were a few other Team Rocket grunts, an Ash and some good cosplay! We didn’t get many pictures with our camera, but here’s a

