Guest Post: 5 Tips For First Time Cosplaying at a Renaissance Faire

medium_3188543495

Renaissance faires are an experience unlike any convention or gathering you have ever been to. If it your first time getting dressed up and participating in one, there are a some things to keep in mind:

1.      Repair Kit

Make absolutely sure you take some sort of repair kit with you in case of a wardrobe malfunction (or tragedy). Duct tape, fashion tape, sewing kit, masking tape, and touch-up paint are the essentials for the dedicated cosplayer. Keep this in your car or hotel room whichever is more convenient.

2.      Pockets

Women may find it more difficult to build into a cosplay than men but they are a must as they are really your best bet at not misplacing valuable things such as your wallet, car keys, cell phone, etc.

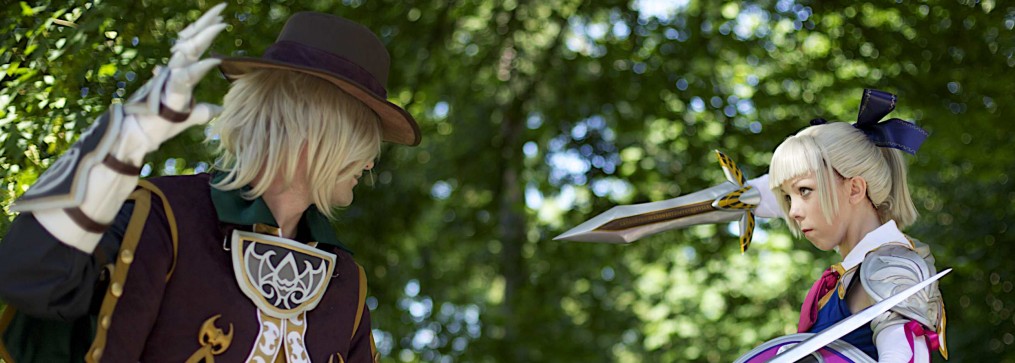
Photo by FreeVerse Photography

Photo by FreeVerse Photography

3.      Costume/Prop Checklist

There is nothing worse than spending days, weeks even, on a cosplay and then finding you forgot the awesome hat, or piece of your fancy armor at home or at the faire. Make a list for yourself to ensure wherever you go, you have everything you intended to bring.

Another thing to include on the checklist is the time and address of the event. Misplacing a vital piece of your cosplay is bad, misplacing the location of the event, the worst.

4.      Food and Drink

It’s easy to get caught up in the fun of the faire and they can get crowded, making it a pain to get out and get some food. If it’s particularly hot, water is essential, especially if you have a few layers to your costume. Pack a few granola bars or a packed lunch. Take onlyenough water to keep you hydrated but don’t overindulge Bathroom breaks can be a pain if you’re deep in a crowd or have clothes that make things difficult.

5.      Paper/Cards and Writing Utensil

You never know what people you are going to meet at these events. Friends, photographers, bloggers, or potential business partners always appreciate it when you have readily exchangeable information and something to write with. Remember the goal is to have fun and meet new people at these events.


Today’s guest post is brought to you by Marie Sumner, who enjoys writing about entertainment and art. She owns more anime than she thinks appropriate to reveal to polite society. Recently, she started writing for Costume Super Center, which gives her an excuse to talk about renaissance costumes, comic conventions, and movies all day.
Guest Post: Tyrande Process Walkthrough!

(Today’s guest post is by Petrai of Petrai Cosplay! She did an amazing Tyrande cosplay for Blizzcon 2011 that we just loved so much that we asked her to do a guest post for us! You all should definitely go check out her page! As usual, you can click on the photos to see the larger version!)


Hey all! I’m happy to be writing a guide for Arms, Armor, and Awesome! Tyrande was definitely a big undertaking but so rewarding. It was a huge learning process as my first cosplay ever and after 6 months, turned out just how I wanted it!

LATEX DETAILING:
So here I’ll basically just focus on the sculpting aspect of the costume, rather than the sewing. This includes all of the silvery dress detailing, as well as armbands and other bits. It was difficult to decide what material I wanted to use, since I knew I needed it to be strong, but also flexible enough to bend with my body, and around my arms with negative space between details. I ended up choosing semi rigid latex, which has basically the consistency of dry hot glue. Clean pulls, no mess, semi rigid and easy to use!

I started off by drawing a to scale blue print of the central detailing on the dress, as well as the bracelets, and then sculpting it in plastalina modeling clay. 

Plastalina clay is the non-hardening clay that they use in Claymation, which is what I needed for the plaster mold. I chose this type of clay so that picking all of the bits out of the mold wouldn’t be overly taxing, plus I could leave my sculpts for days on end and come back to them when I wanted to continue working. The reason I needed a plaster mold vs. a silicone mold is because the final positive would be made of semi-rigid latex, which cannot harden in a silicone mold. I ended up gluing all of the clay parts together with super glue, just to keep it all from rolling around when I moved it or poured plaster. The plaster was very easy, I used normal cardboard boxes as mold boxes and hot glued them to make sure they wouldn’t leak, and poured the liquid plaster over the clay. When my plaster was hard, I removed the mold from the box, let it fully dry for 24/hrs, and poured my latex. The trick with the latex was to make sure it was 100% hard, which took a lot of patience (Days, with multiple pours as it slightly shrinks when it hardens). When it was ready, I pulled it and it was exactly what I wanted! Of course, the first pull was the best, and over time my plaster mold would break down, but I only needed it for essentially 6-8 pulls.This image shows a good progress; from the mold to the painted product. I ended up having to cut off a lot of excess with an exact-o knife, as well as air bubbles. I painted it with metallic acrylic paint, weathered it, and then it was sewed onto the dress (or attached around my arms).

EYEBROWS/WIG:

For the eyebrows, I wanted them to look as naturally night elfish as possible, without looking too glued together. I ended up opting for pheasant feathers which turned out to be pre-dyed the perfect shade of teal. I gently cut the majority of the feather base off, and then on the ends below the wick I cut off the small fibery parts but was careful to keep them clumped together and available for re-use. The hardest part was gluing these cut pieces and a small jewelry wire along the wick, to give them shape and a fuller look. This took a lot of patience, gluey fingers, and frustration, but it ended up coming together in the end. 

For the wig, I had to do seriously no styling beyond sewing in little pearl beads to simulate the dew drops in the reference image. For the leaves I picked real ones, scanned them, printed, decoupaged, cut, and folded them, then sewed them into the wig. Easy!

GEMS:

The gems were sculpted out of extra clay, then I made a silicone mold and casted them out of clear resin (I picked it up from Micheals arts and crafts), and when they were dry I painted the bottoms with varying shades of blue nail polish, and sealed it with the reflective side of tinfoil. Voila!

A full album of photos can be seen on my cosplay page here!

I hope that was helpful! Feel free to message me on my cosplay page if you have any questions, I’d be happy to help. Thanks!