

I know, it’s been almost a year, but we’re finally doing a post about how we made Mario’s Spell Breaker costume for BlizzCon 2013! This post will focus on the costume/wig/mask part of the cosplay, and the next post will be on the weapon and shield.

So, we didn’t sew the coat or the tabard; Mario’s mother made those for us, since we started so late in the year and were crunched on time (plus, she always asks if she can help!) We did find the fabric and sent it to her, though. We went through several fabric stores looking for just the right red, and ended up sending a stretch sateen to her!
The tabard was painted on canvas fabric- this is all one flat layer!
 Now, this guy has some really, really weird pants. We did what we could to find black and gold striped fabric that I would cut into strips and then stagger and sew together to give this effect, but… even after spending several hours at the LA fabric district, we were unable to find anything even close. So, we designed and printed our own fabric through spoonflower!
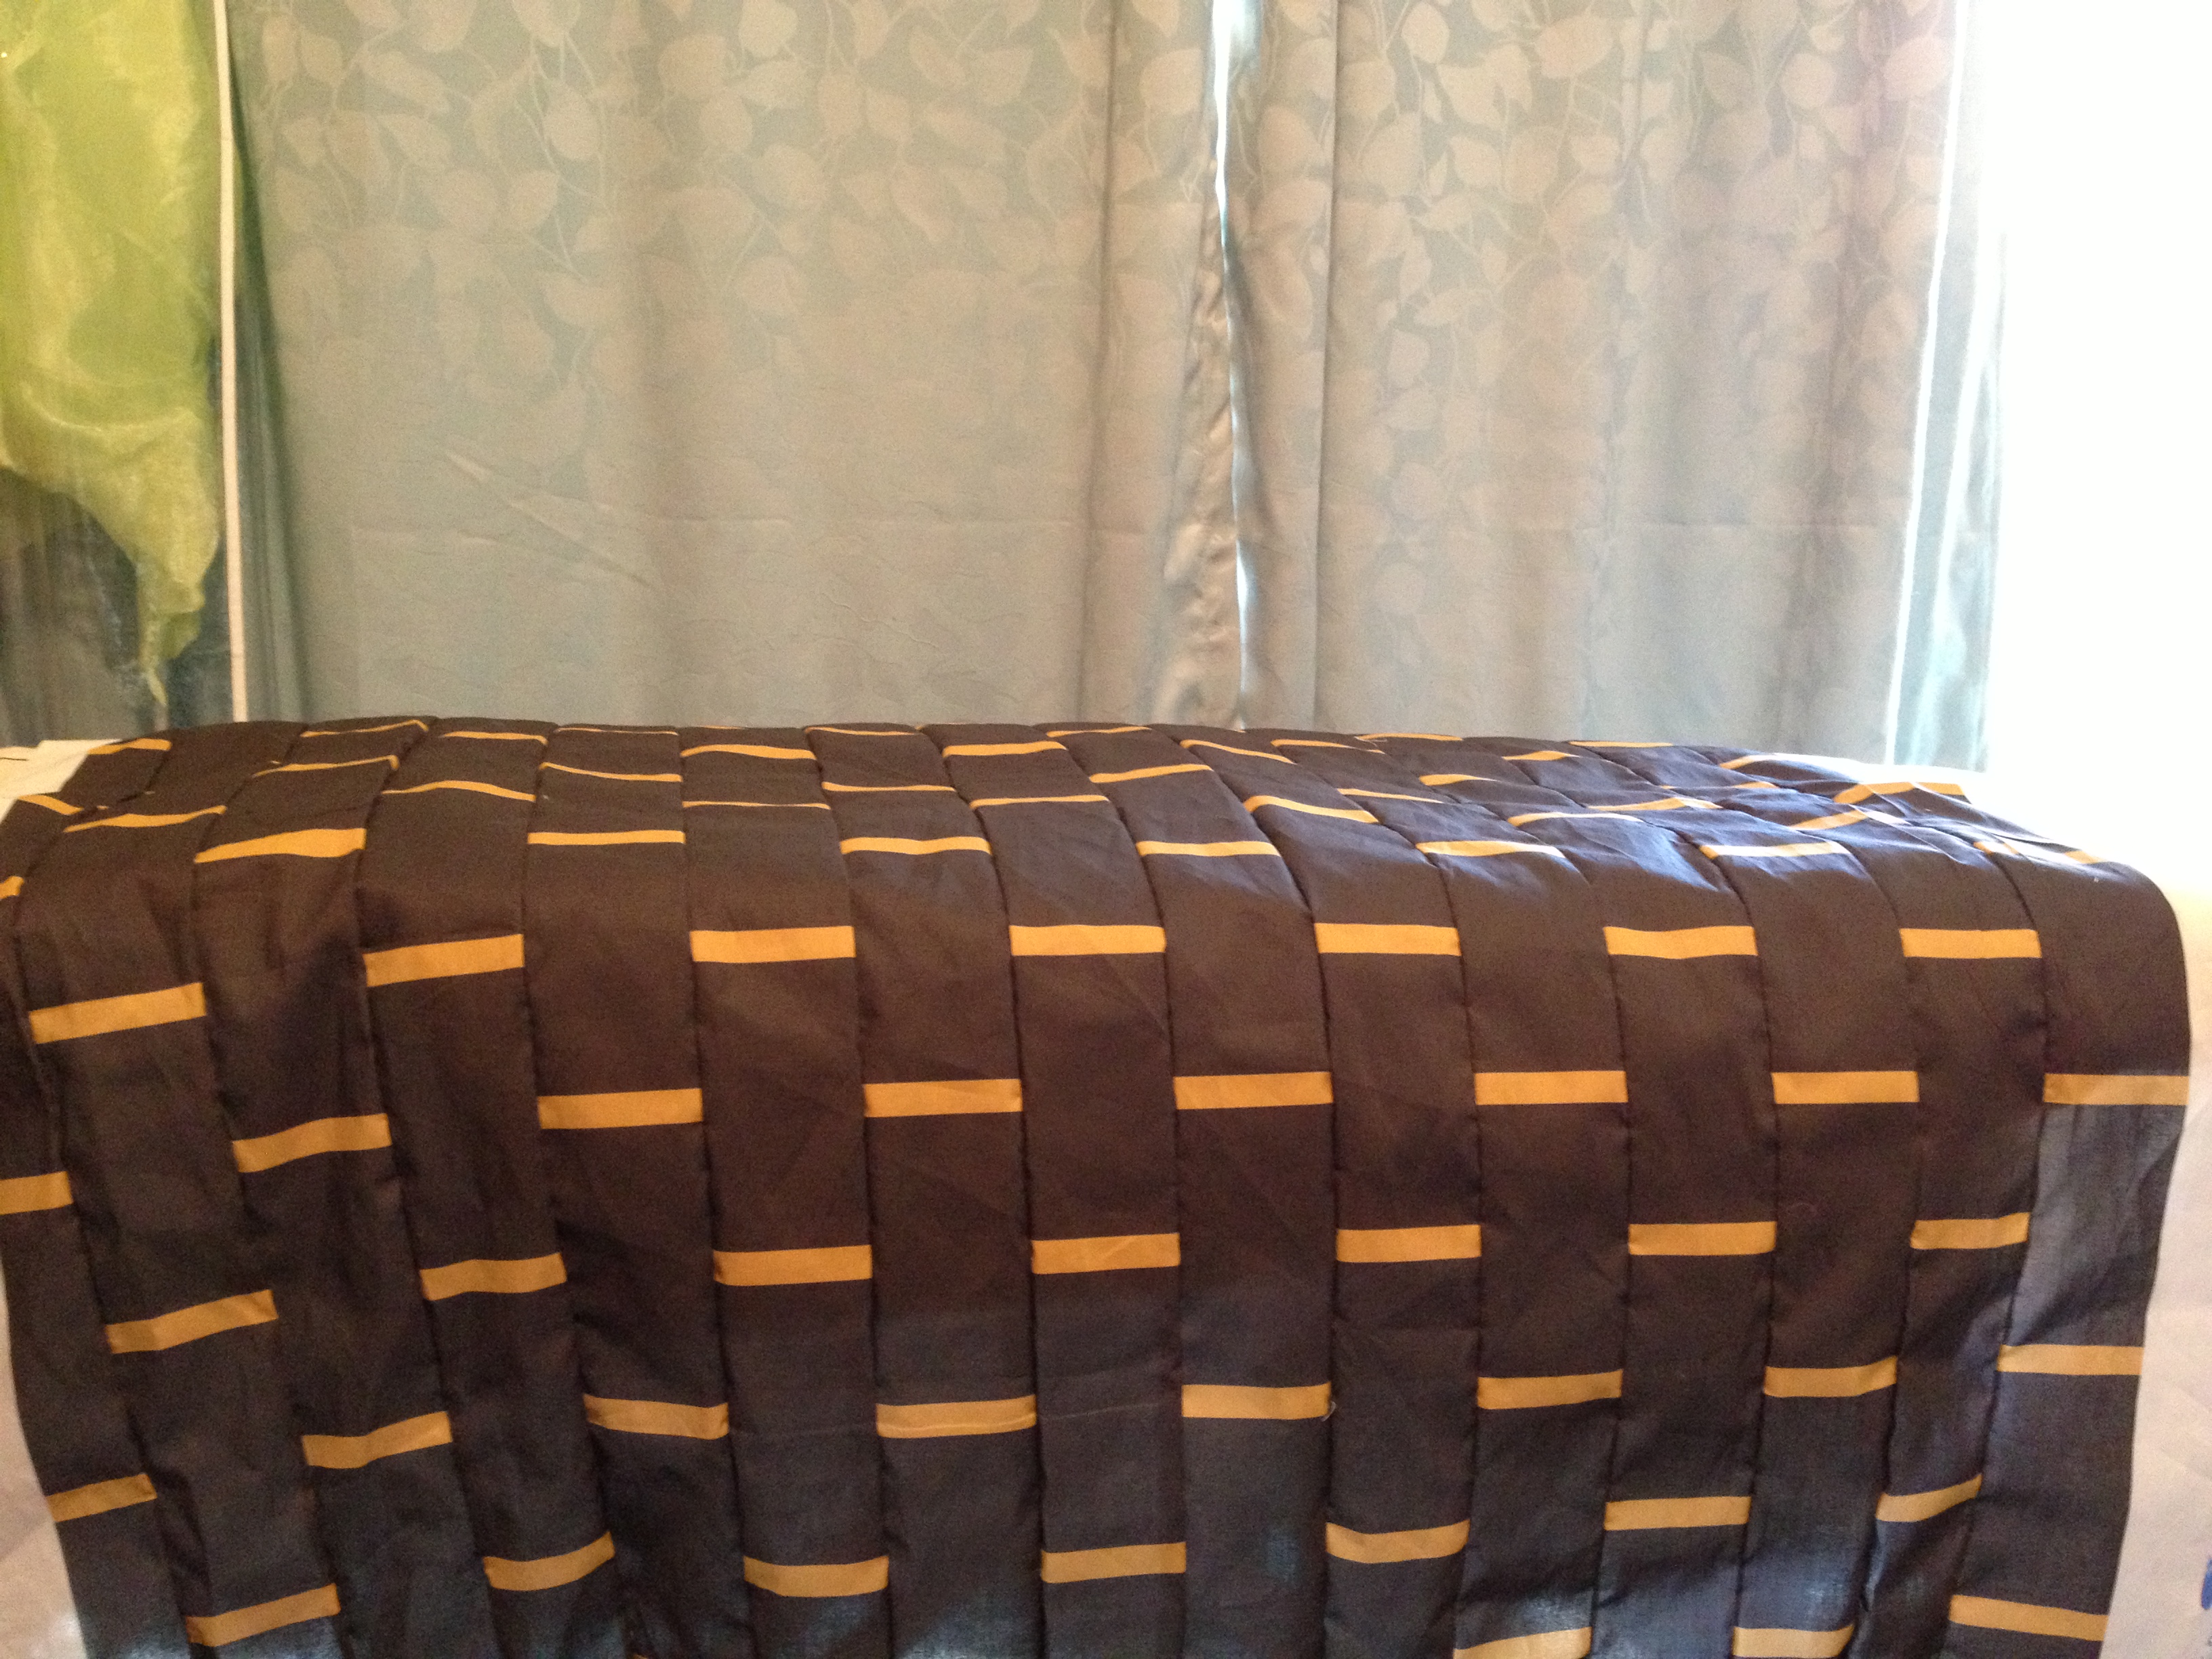
I designed it so the stripes were already the right width and staggered, so all I had to do was fold and sew to make the seams!

The pants ended up exactly how we envisioned! I just sewed them with a pajama pant type pattern, but left the legs as wide as I could.

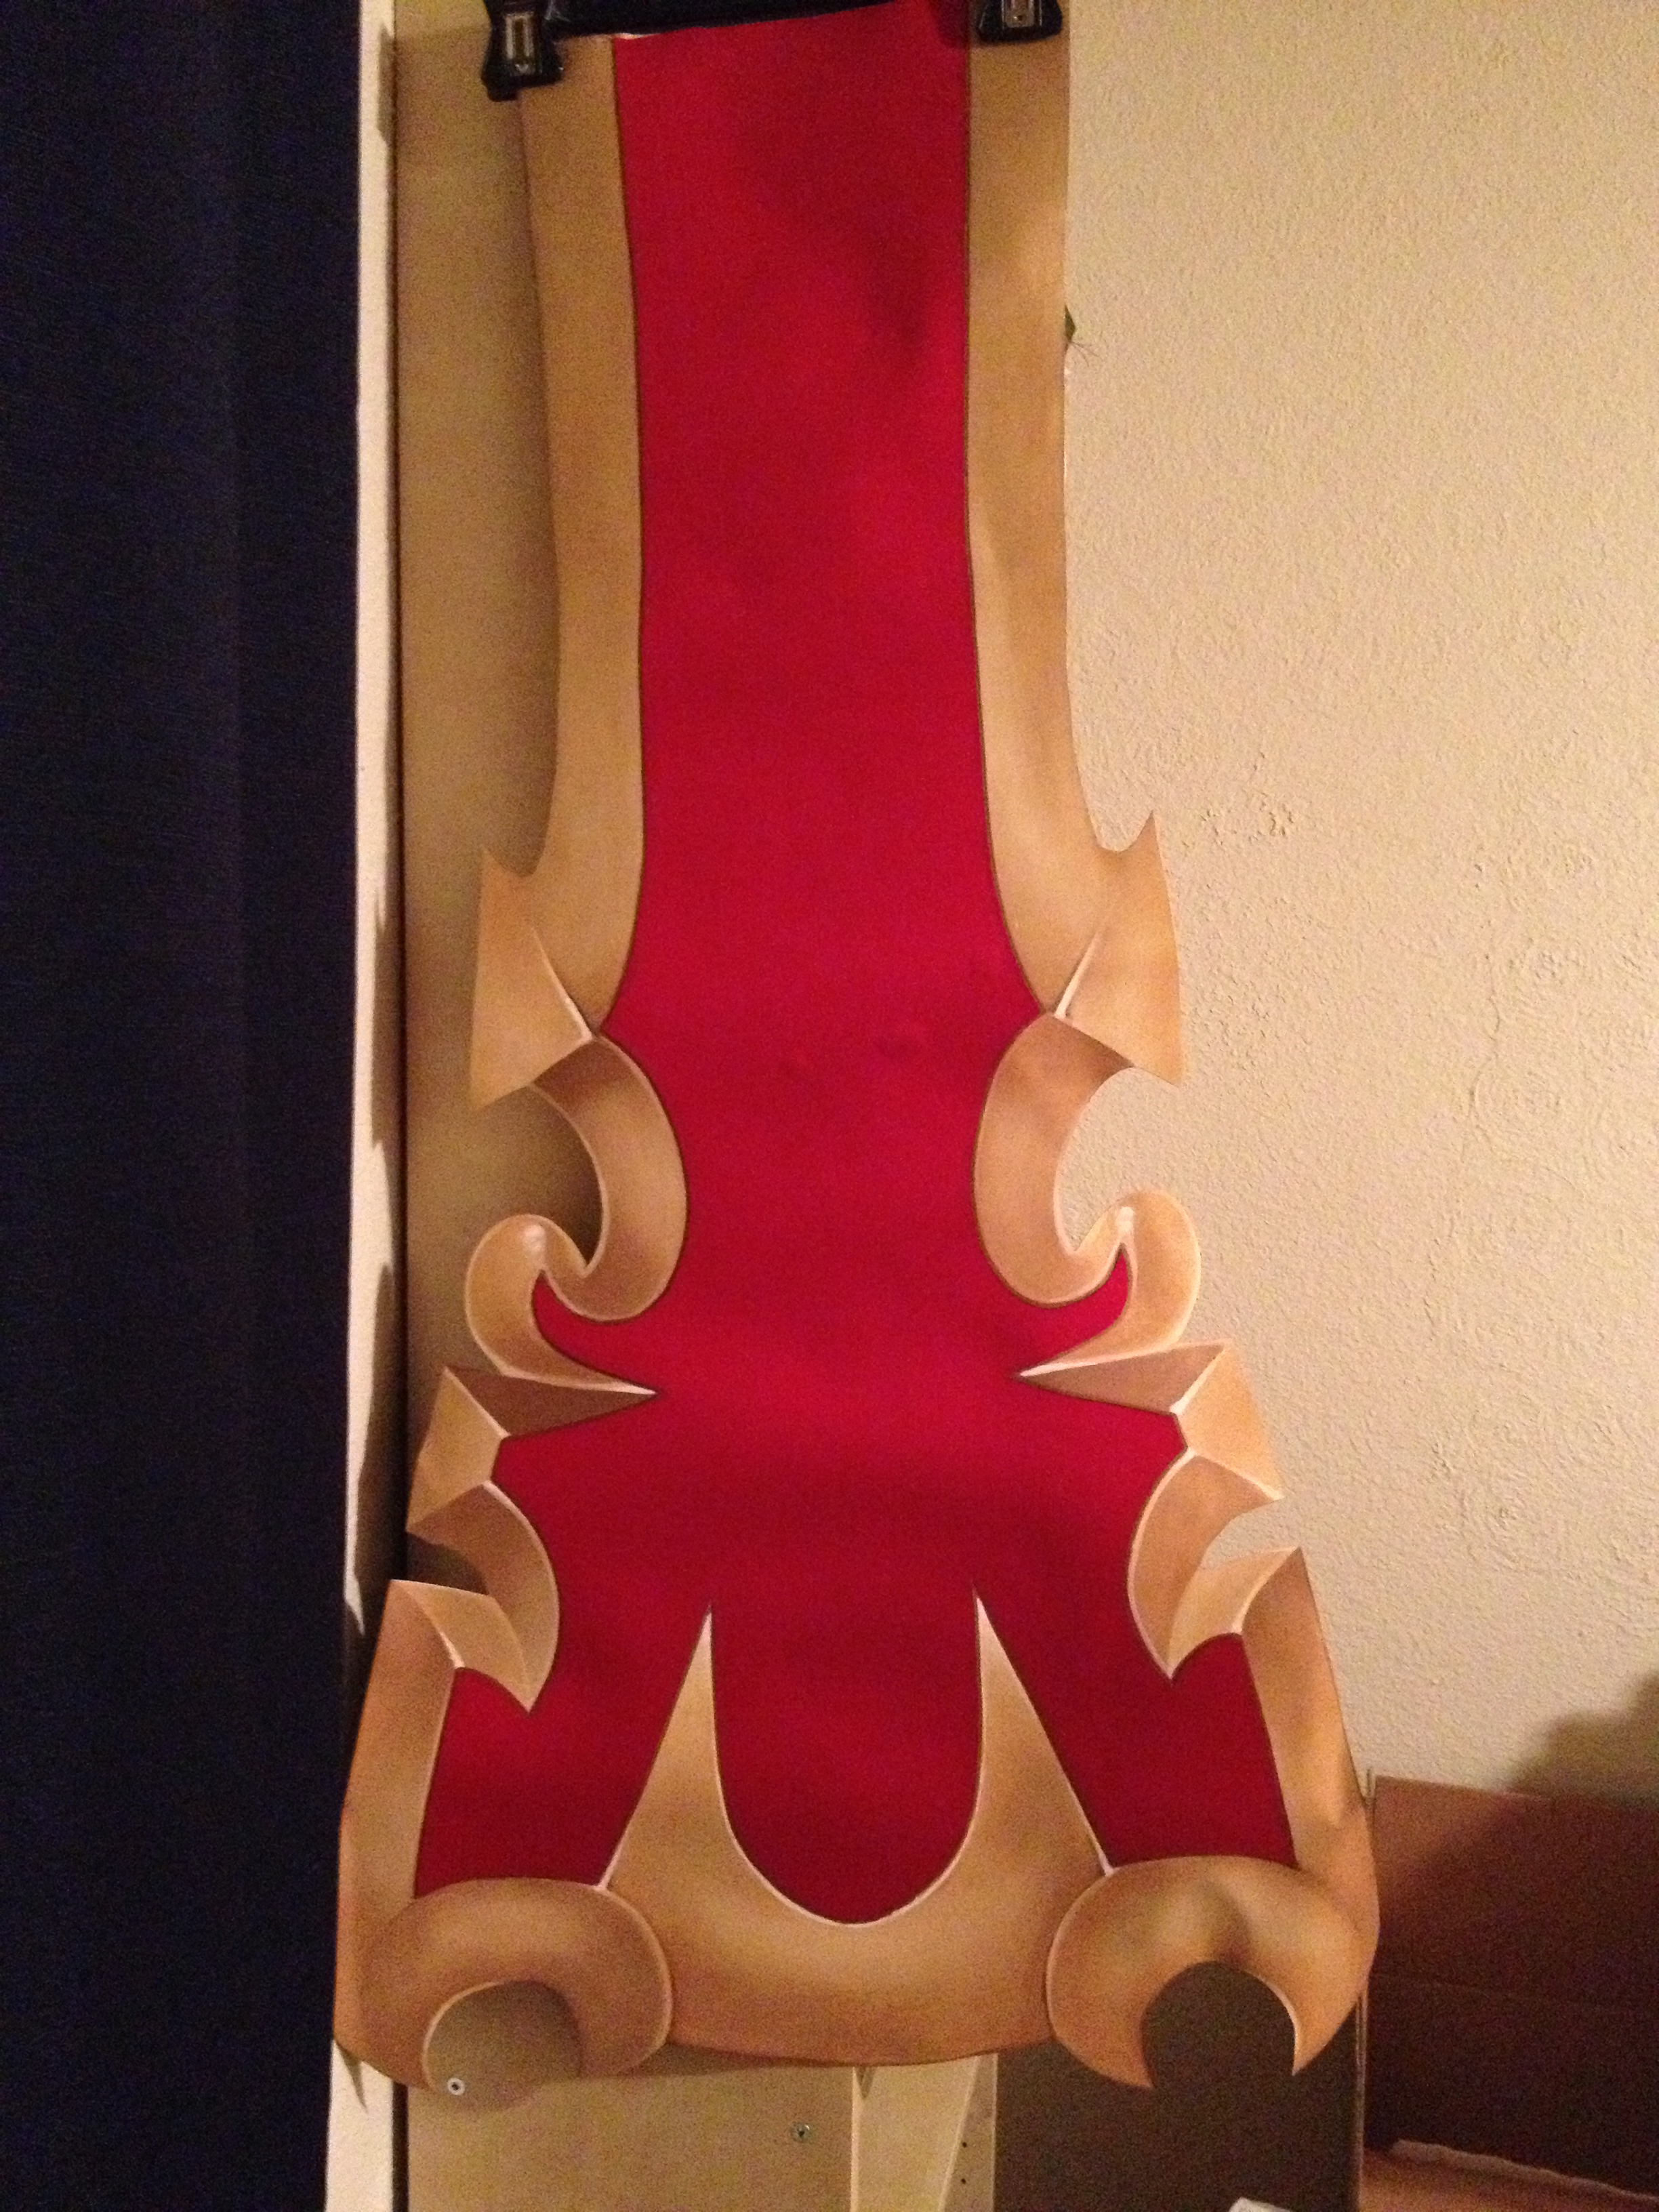
This was the foam template for the mask! If we remade this, we’d make it shorter on the bottom and taller on the top, because Mario had to hold his head completely straight to keep from bumping the mask into his costume. That gets tiresome after 8 hours!

Here it is after being covered with worbla and shaped over his head, as well as covered in many coats of gesso, sanded, and with the base layer of paint. Our talented friend Sarah helped to paint the mask!

Mario mounted two green LEDs that helped to make it look as if his eyes glowed green in the dark!

He put the switch right on the inside of the mask, under the hair of his wig so that it was easy to reach and turn on and off. The mask was held on by an elastic band that went around his head. The mask went on first, then the wig!

Here’s with the costume partially on. It’s important to put on anything you’ll be wearing underneath armor or whatever you’re patterning! We wrapped him in saran wrap and masking tape, and then our friend Sarah drew out the design because, well… Mario and I were fighting over how it should look, so we left it to a third party, haha!

Sorry for the random jump in progress, but this is the farthest back I have of the chest piece. It’s made out of EVA foam, and the trim is made from the trim you put on your door to keep the wind out… like this stuff!

The design on the shoulders was just gently carved in with a dull pencil, and the whole thing was covered with several coats of plasti-dip. Then it was spray painted gold, because hand painting on gold is a pain.

After that, black was brought back into the piece! The indentations were weathered with a bit of a wash of black (not shown above yet!)

The gems and weird bird thing was added! The middle bird piece was made out of apoxie sculpt, as were the gems.

The gems were made by building up a structure like this…

then roughly filling it all in with apoxie sculpt…

It looks like this after hours of sanding and filling in any imperfections! So worth it, though.

The shoulders started out like this, out of worbla, and then had the details added on and shaped with worbla as well.

They were then given many coats of gesso and carefully sanded!

Photo by Davann Srey Photography
The shoulders were just given a light wash, and the eyes were apoxie sculpt. They were held on with tabs of Velcro.
All that was left was the eyebrows, which were made with some blonde wefts I had that matched his wig, which was Morpheus from Arda Wigs! I glued them together with some Aileen’s glue which dries clear, and trimmed them. I’ll have a tutorial up on that soon!
We didn’t actually attach the eyebrows to Mario, they’re glued to the inside of the mask!
That’s it for this post! Thanks for reading, and as always, don’t hesitate to ask any questions, either here or on our Facebook page!
