(Today’s tutorial is a guest post from Kevin of Miccostumes.com!)
Dante’s Rebellion sword is sought after by many cosplay fans. In this tutorial, I’ll show you how I made my own Rebellion sword. With this tutorial, you will be able to make it personally.
 Required materials: carbon fiber tube, airplane board, plastic board, pearl board, water putty, acryl pigment, paint spraying outfit including drawing utensil, utility knife (a small one and a big one), white latex, hot melt glue, AB glue (being transparent, it can harden in 4 minutes), abrasive paper (No. 100 to 400 should be all prepared) and watercolor utensil.
Draw a rough picture of the sword’s shape and write down the detailed length on each part. Steps of calculation are of great importance, which directly decides the similarity level of the final product.
Calculate the length of your sword. By a visual test, we know Dante is 180 CM high and his rebellion sword is 160 CM long. Follow this formula to know how long your sword should be: your height times 160 (the length of the sword). The result divided by 180 (Dante’s height). The final number is the length of your sword. Then, how long or wide other parts should be can be calculated and adjusted by proportion drawn on the paper.
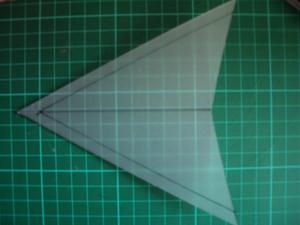
According to the proportion, cut the airplane board. Carbon fiber tube needs to be imbedded into the middle axis, being the mainly supporting structure. Bond it by white latex and hot melt glue. Then, polish the edge of the sword. As we all know, the most troublesome part on a sword is the ridge. When it comes to making the blade of sword three-dimensional, you can use plastic board to set up the chine line. First of all, calculate the needed length.
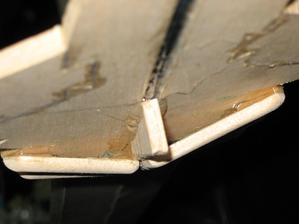
Cut the desirable plastic board according to above size. Fold it to form the cline line and edge of the sword. Bond it on the blade of sword made from airplane-like board by AB glue. Then, the blade of sword has been finished.
The cline line can be folded by hand. But make sure to draw the line first. Edge of sword can be finished with the help of pliers and steel ruler. The steel ruler is used to increase the length pliers can fold once, saving time and reducing the damage on the plastic board.
 Use the pliers and steel ruler to fold the edge of the sword.
 This is the folded edge of the sword.
 After bonding them, the cline line has appeared.
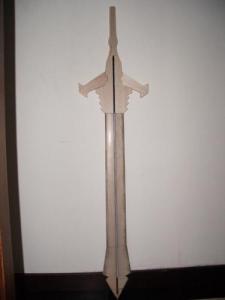
This is the whole modeling of the sword, cut from the airplane board. The blade of sword is supported by a plastic board. It can be seen that the hand guard part is still flat. The hilt seems three-dimensional due to the airplane board. Here, take a closer look at the hilt.
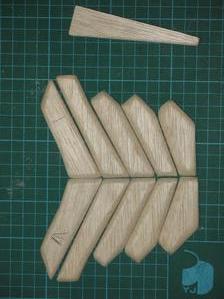
When it comes to making the rib, you need to cut its shape first. Then, use abrasive paper to polish those edge lines, making them seem natural and irregular.
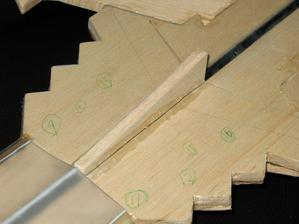
Ribs in the original anime don’t lie in the same plane. They are from high to low and finally to the blade of sword. To display this shape, you can cut a piece of airplane board and bond it on the central shaft. Then, bond the ribs.
 Hot glue can be directly used to fix those trapezoidal wood blocks on the central shaft.
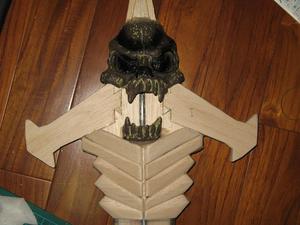
 Bond ribs, which have been polished, onto the trapezoidal wood blocks by hot melt glue.
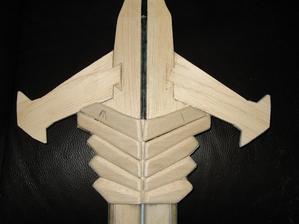
 Pour some hot melt glue inside those blocks too.
After finishing the ribs, it’s time to make the symbol of the rebellion sword – skull. Material used here refers to a skeleton purchased from a shop during Halloween. Pay attention to this: the Rebellion sword is composed of two faces. So you need to buy two pairs of skeletons. Yes, it’s two PAIRS because the skeleton I bought only has teeth on the upper row. But there is a big mouse on the Rebellion sword above and also below. Only the teeth part on one pair is used. It’s wasteful? For sure, it’s not, because skeletons are really cheap, XD.
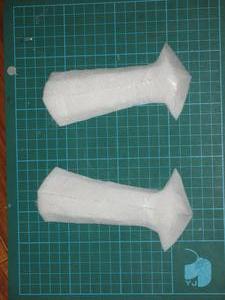
 Before bonding skulls upon, use hot melt glue to finish parts on two sides first. While fixing, make sure to press the glue by hands at the junction between skull and airplane-like wood until the glue becomes hard. Otherwise, it can’t fix at all. Referring to making a big bone, you are not suggested to use airplane wood because it needs to be folded times to make the desirable depth and it’s time-consuming to polish them. So just use pearl board here.
This is the three-dimensional look, cut from the pearl board.
A rough look has appeared.
This is the whole semblance.
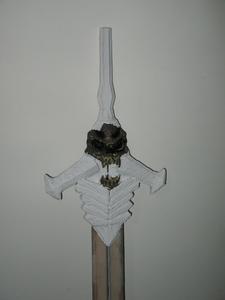 So far, only the putty work is left. While using putty, it’s necessary to add some water to mix well if you want the surface smooth and tidy. But for putty that dries slowly or you don’t want a smooth surface, you don’t need to add water. In this case, the putty will become hard more quickly. Originally, I didn’t think I could make the sword look as irregular as what we saw in the anime. But with the magic effect of chopsticks, I succeed to make it much more vivid, XD.
You are also astonished by the effect of chopsticks? The method refers to using chopsticks to draw those lines after using putty. Till now, the shape of the whole sword has almost been expressed. Only some small alterations and painting are left.
Finally, let’s make those easily destroyed elements on the sword. High-density sponge is adopted. Use the utility knife to cut the desirable shape and bond it by hot melt glue. Then, it’s not difficult for beginners to use acryl pigment. Method of application is similar to the way to use watercolor pigment. It looks pretty after drying and paint will hardly fall. Black and silver acryl pigments both need buying.
While coloring, black is used on all parts except the skull. Then, mix black and silver pigment in the proportion of 5:1 to make the dark silver color, which will be used on the skull and hilt. The blade of sword can be painted by ordinary electro-silvering paint. Paint a thin layer first. Then, paint once again. If possible, paint more times and polish by No. 400 abrasive paper.
Yeh, sword on the right is the 2nd Rebellion. Made in a really short time, it looks rough.
Enjoy my pictures!

 Author bio: Kevin works for Miccostumes.com, a shop supplying cosplay items online, like Devil May Cry cosplay costumes. He’s also busy with running his cosplay blog. He can be also found on facebook or twitter.






How heavy is it during end results?
This thing really helps! :)
Thanks for your help. Before I was trying to buy one but this helped me a lot!!!!!!!!!!!!!!
Does the sword have 20cm less than your size because Dante’s sword is 180cm and his sword is 160cm
where you buy the skeleton?
This was a guest post so I’m not sure where the skull was bought if that’s what you meant. I think that many Halloween stores generally carry such skulls, though, and year round if you look online!
I guess, this post just added me one of my life goals, to make one of that awesome and bad ass sword. I like how the rebellion really fitted into Dante’s arsenal, I have his cosplay costume from http://cosplaysushi.com/ , it would be better if I have that :(
Any guess on how much the materials costed in total to make the sword? I’m working on a budget which is why I need to make my own instead of buying a ridiculously overpriced 300$ one.
I’m not sure of the total cost, but I would think (as long as you’re shopping around for prices and get just what you need) that the sword should be much less than $200 to make.
Can someone please tell me were I can find “airplane board,” I can’t find anything on it.
And/or what is a “pearl board?”
Airplane board would also be balsa board or hobby board.
Pearl board is another word for styrofoam board, not the stuff made of lots of tiny balls but the more dense stuff.